As with anything that has moving parts, your turntable will suffer from wear and tear. Accordingly, maintenance, from simple cleaning and oiling to replacing parts will be required periodically. Read on to find out my take on turntable maintenance.
Preventative measures

Your turntable doesn’t exist in a vacuum. Your house is a place of movement, of comings and goings. It attracts dust. It generates dust. It is inevitable that at some point some of this dust will find its way towards your turntable. This may be due to the small static charge that is created by the friction between the stylus and the record. It may come directly from the record itself.
So, keep your house tidy. Well, as tidy as possible. Use your turntable’s dust cover. Especially when you’re not spinning discs, but even when you are. Keep that dust away.
Exercise good care of your records. Now this goes without saying, or it should do, and I have written about it here. In a nutshell, give your vinyl a wipe before you put it on the platter and give it a wipe before you put it away again. Oh, and keep your dirty mitts off it!
Clean your turntable
Even with the best cleaning regime, your turntable will get dirty. Not filthy dirty, not dirty like you dragged it through puddles of mud, but dirty enough to have an impact on performance.
Make it a regular part of your household cleaning regime that you wipe down your turntable with a microfibre cloth. If it’s noticeably dirty, use some rubbing alcohol on your cloth. In this case, always make sure that your turntable is completely dry afterwards – use a different cloth for this.
Clean your stylus
From time to time, you will also need to clean your stylus. Obviously, this is the thing that comes into direct contact with your records, so it can attract and deposit dust and dirt. Clean it with a stylus brush from time to time. Always sweep from back to front in a gentle motion.
So that’s for the exposed surface of your turntable and the stylus. What about the inner workings of your pride and joy? Think of this as your spring-cleaning task. It only needs to be once, perhaps twice a year.
Clean the inner workings
You are going to need to dismantle your turntable to do this properly. Don’t be afraid of this. After all, somebody put your turntable together in the first place You’ve got this.
Before you start, please make sure that your turntable is switched off and disconnected from your household supply. If it does shock you, it’s only going to be a minor jolt, but it’s not really something that you want happening.
When you are ready, lift off the platter. This is the flat round piece upon which your records site as they spin around.
Clean the platter, especially the bottom side of it. The top is accessible without you having to dismantle your machine.
Then, you should clean the spindle. This is the thin metal rod which stands upright in the middle of the platter; it goes through the hole in your record.
Once you have cleaned the accessible part of the spindle, you should be able to lift it up a bit. This will enable you to reach the dirt built up around the bottom. Add a drop of oil after cleaning it. It’s a moving part and it needs to move as smoothly as possible.
If you have a belt-driven turntable, remove the belt and give it a wipe either with just a cloth or if you think it needs it, some rubbing alcohol.
Once you have cleaned everything, make sure that all is dry and put it all back together again.
Replacing parts
Vinyl is best. I’m sure you agree. That’s why you’re here, n’est pas?!
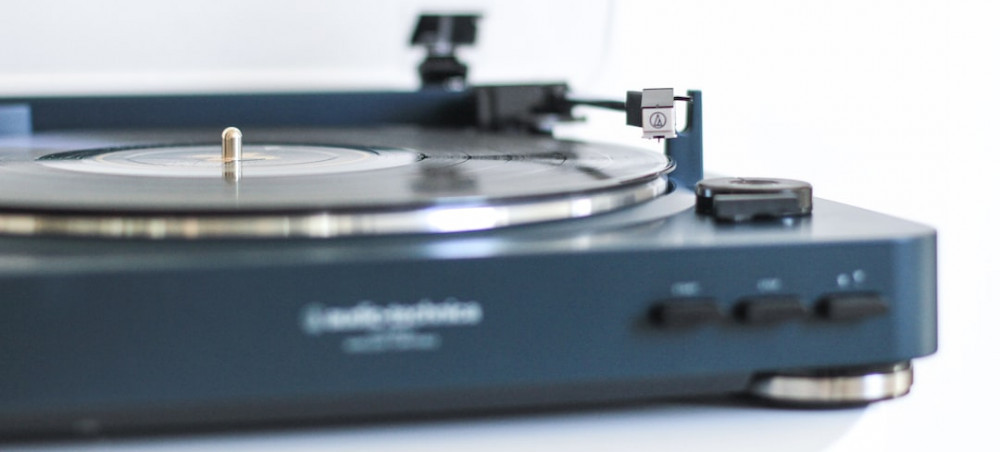
Your vinyl will only sound as good as it should if the components of your sound reproduction equipment (your turntable) are in tip-top order. The first and most important component is the stylus.
As we have seen above, special care and attention should be taken to keep it in good nick. But it comes into direct contact with your records, so it is going to degrade physically over time. As a result, you will need to replace it.
Does the stylus need replacing?
But how soon should you replace your stylus? This question is subject to frequent discussion amongst the audiophile community. To a greater extent, this question is at least partially influenced by how often you clean it.
Properly cleaned on a regular basis, and your stylus should last for between 800 and 1,000 hours of listening. However, this is a rule of thumb. You should listen (obviously) out for signs of wear on your stylus. These will include but are not limited to sounds not sounding as bright as they should; reproduction may sound fuzzy, or it may appear to hiss; the treble may start to sound less clear. Other signs may be jumping or skipping, especially when this is a new occurrence – although there may be other reasons for this.
As a final check, look at your stylus with the aid of a magnifying glass. If it appears worn, then combined with all the other indicators, it is probably time to change it.
A moving magnet cartridge means that you can replace the stylus yourself. You simply grip the old stylus in one hand and the cartridge in the other and pull the stylus until it comes away. With a moving coil cartridge, however, you are not able to do this because the stylus is bonded to the cartridge. Your only option in this case is to buy a new cartridge. The cost is higher, and it is probably a little more of a challenge for your DIY skills.
Changing your MC cartridge
Using a jeweller’s flathead screwdriver, first remove the cartridge from the headshell. Take care not to drop the cartridge. Next, using pliers or tweezers, disconnect the wires from the cartridge. Take note of the colours of the wires and which pin they are connected to – you need to connect the wire from the new cartridge to the correct pin.

To do this, line up the new cartridge to the headshell, and then use your flathead screwdriver to attach it. You shouldn’t tighten the screws too much, just make sure the cartridge is in place and there’s a little bit of wiggle room. You’re nearly there now. So, using your tweezers, gently reattach the headshell’s wires to the pins on the new cartridge. Take extreme care when handling and connecting your new cartridge. Any accidental damage to it or the stylus will be costly.
Weight adjustment and fine alignment
There are two jobs left now – weight adjustment and fine alignment. First, you will need to add weight to ensure the cartridge will sit properly in the record groove rather than float above.
Finally, you will need the tracking alignment gauge. Use the gauge’s parallel lines to align the cartridge body by measuring at two different points: one near the centre of the platter and the other towards the outside edge. Once the cartridge is aligned at one of these positions, move the arm to the other, check and re-adjust if necessary. You may need a few iterations until everything lines up just so.
Take your time over these two tasks so that you can make sure the cartridge is aligned correctly. When this is the case, the stylus top will sit at the proper angle in the record groove, distortion levels will drop, and record/stylus wear will be minimised.
With a belt-driven turntable, you will need to replace the belt every few years. You may notice a slight speed distortion which will indicate that this step is required. Bear in mind that it’s not a one-size-fits-all situation. Your new belt must be compatible with your turntable model!
The last word
As with any piece of equipment with moving parts, it never hurts to have your turntable checked out by a professional from time to time. Think of it as a necessary expenditure, like a car service.
If you have enjoyed this article or have anything you would like to add to the debate, please leave me a comment below.
Hey Simon,
What a great article and full of nostalgia for me. I have vivid memories of changing my stylus, but I didn’t know what an MC cartridge was, so I’ve learned something new here today.
A very detailed guide on how to optimise our listening experience and get the best out of our records.
I particularly like the ‘keep your dirty mits off’ statement. Such a crucial, yet simple statement. Our fingers can transfer oils to our precious lp’s and that too can affect our sound quality.
Brilliant article, super detailed and informative and wonderfully nostalgic too.
Thank you for taking the time to educate me and all your readers with your evident knowledge.
All the very best to you
Cherie :o)
Hi Cherie, thank you for your comment. I think the phrase “keep your dirty mitts off” is one which should echo down the ages across most aspects of the human experience.
I am trying to get a meld of practical advice and nostalgia on the site, so I am pleased that I have ticked those boxes, if only for you, lol.
For more about the technical aspects of turntables, moving coil cartridges, moving magnet cartridges and many other vinyl nuggets, please refer to my glossary of turntable technology.
Simon 😉